SwiftUI Bindings
Earlier this year, after the WWDC keynote announcements, I wrote about SwiftUI ScrollViews. This was my first foray into the world of SwiftUI. And since then, things have changed quite a lot.
For the many who picked up Swift when it was still young, the fast changes to the SwiftUI implementation won’t come as a surprise. For a lot of us, though, the opaque changes and lack of documentation are immensely frustrating.
In this post I’ll continue with a variation of the ScrollView application previously posted, and implement some State and Binding properties to allow the application to respond to changes in state.
Our current app looks something like this:
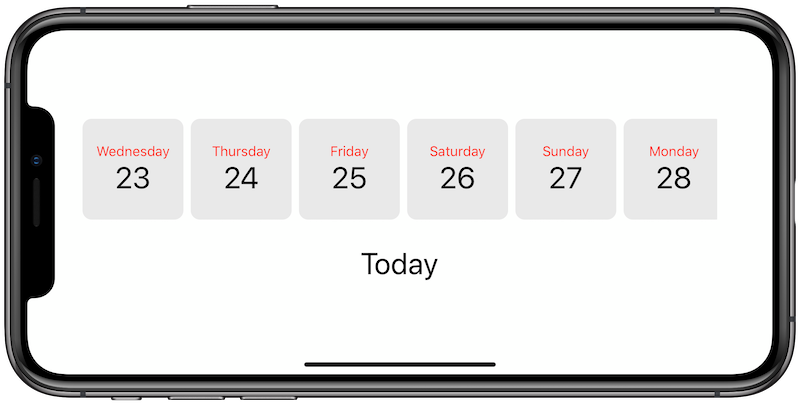
The date cards are displayed in a ScrollView much life the gift items in our previous app. Here’s the complete code:
import SwiftUI

let lightGrey = Color(#colorLiteral(red: 0.9160255393, green: 0.9160255393, blue: 0.9160255393, alpha: 1))

struct ContentView: View {
    var dates: [Date] {
        (0...10).map { offset in
            Calendar.current.date(byAdding: .day, value: offset, to: Date()) ?? Date()
        }
    }

    var body: some View {
        VStack {
            ScrollView(.horizontal, showsIndicators: false) {
                HStack {
                    ForEach(dates, id: \.self) { date in
                        DayView(date: date)
                    }
                }
            }
            .padding()
            SelectedDayView()
        }
    }
}

struct DayView: View {
    var date: Date
    let size: CGFloat = 110

    var body: some View {
        VStack {
            Text(dayName).font(.system(.callout)).foregroundColor(Color.red)
            Text(dayNumber).font(.system(.largeTitle))
        }
        .frame(width: size, height: size)
        .background(lightGrey)
        .cornerRadius(10)
    }

    var dayName: String { return formatDate("EEEE") }
    var dayNumber: String { return formatDate("d") }

    func formatDate(_ format: String) -> String {
        let dateFormatterGet = DateFormatter()
        dateFormatterGet.dateFormat = format

        return dateFormatterGet.string(from: date)
    }
}

struct SelectedDayView: View {
    var body: some View {
        Text("Today")
            .font(.system(.largeTitle))
    }
}

struct ContentView_Previews: PreviewProvider {
    static var previews: some View {
        ContentView()
    }
}
As you can see, it’s pretty straightforward. We create 10 Date objects (starting from Today), and put them inside a ScrollView. Each date object is wrapped in a DayView that’s designed to encapsulate the style and functional behaviour of our day views.
We have a label below with the static text “Today”. You probably guessed where this was going: We want to update this label when the user clicks on one of the dates.
In classic UIKit, you would achieve this by doing something like:
- Add a UITapGestureRecognizer to our day views
- Implement a target function that is executed when the tap event occurs
- Add @IBOutlet to our day view and labels
- Update the label inside our tap function
There’s nothing wrong with this flow. It’s distinctively imperative, and that’s not exactly a bad thing. Things are a little different in SwiftUI, though.
Enter @State and @Binding
The declarative nature of SwiftUI means we have to change our way of thinking a little. Our steps turn into something like this:
- Add a tap gesture to our day view
- Update the currently selected date when the tap event occurs
- Create a Binding to this value to keep the label updated
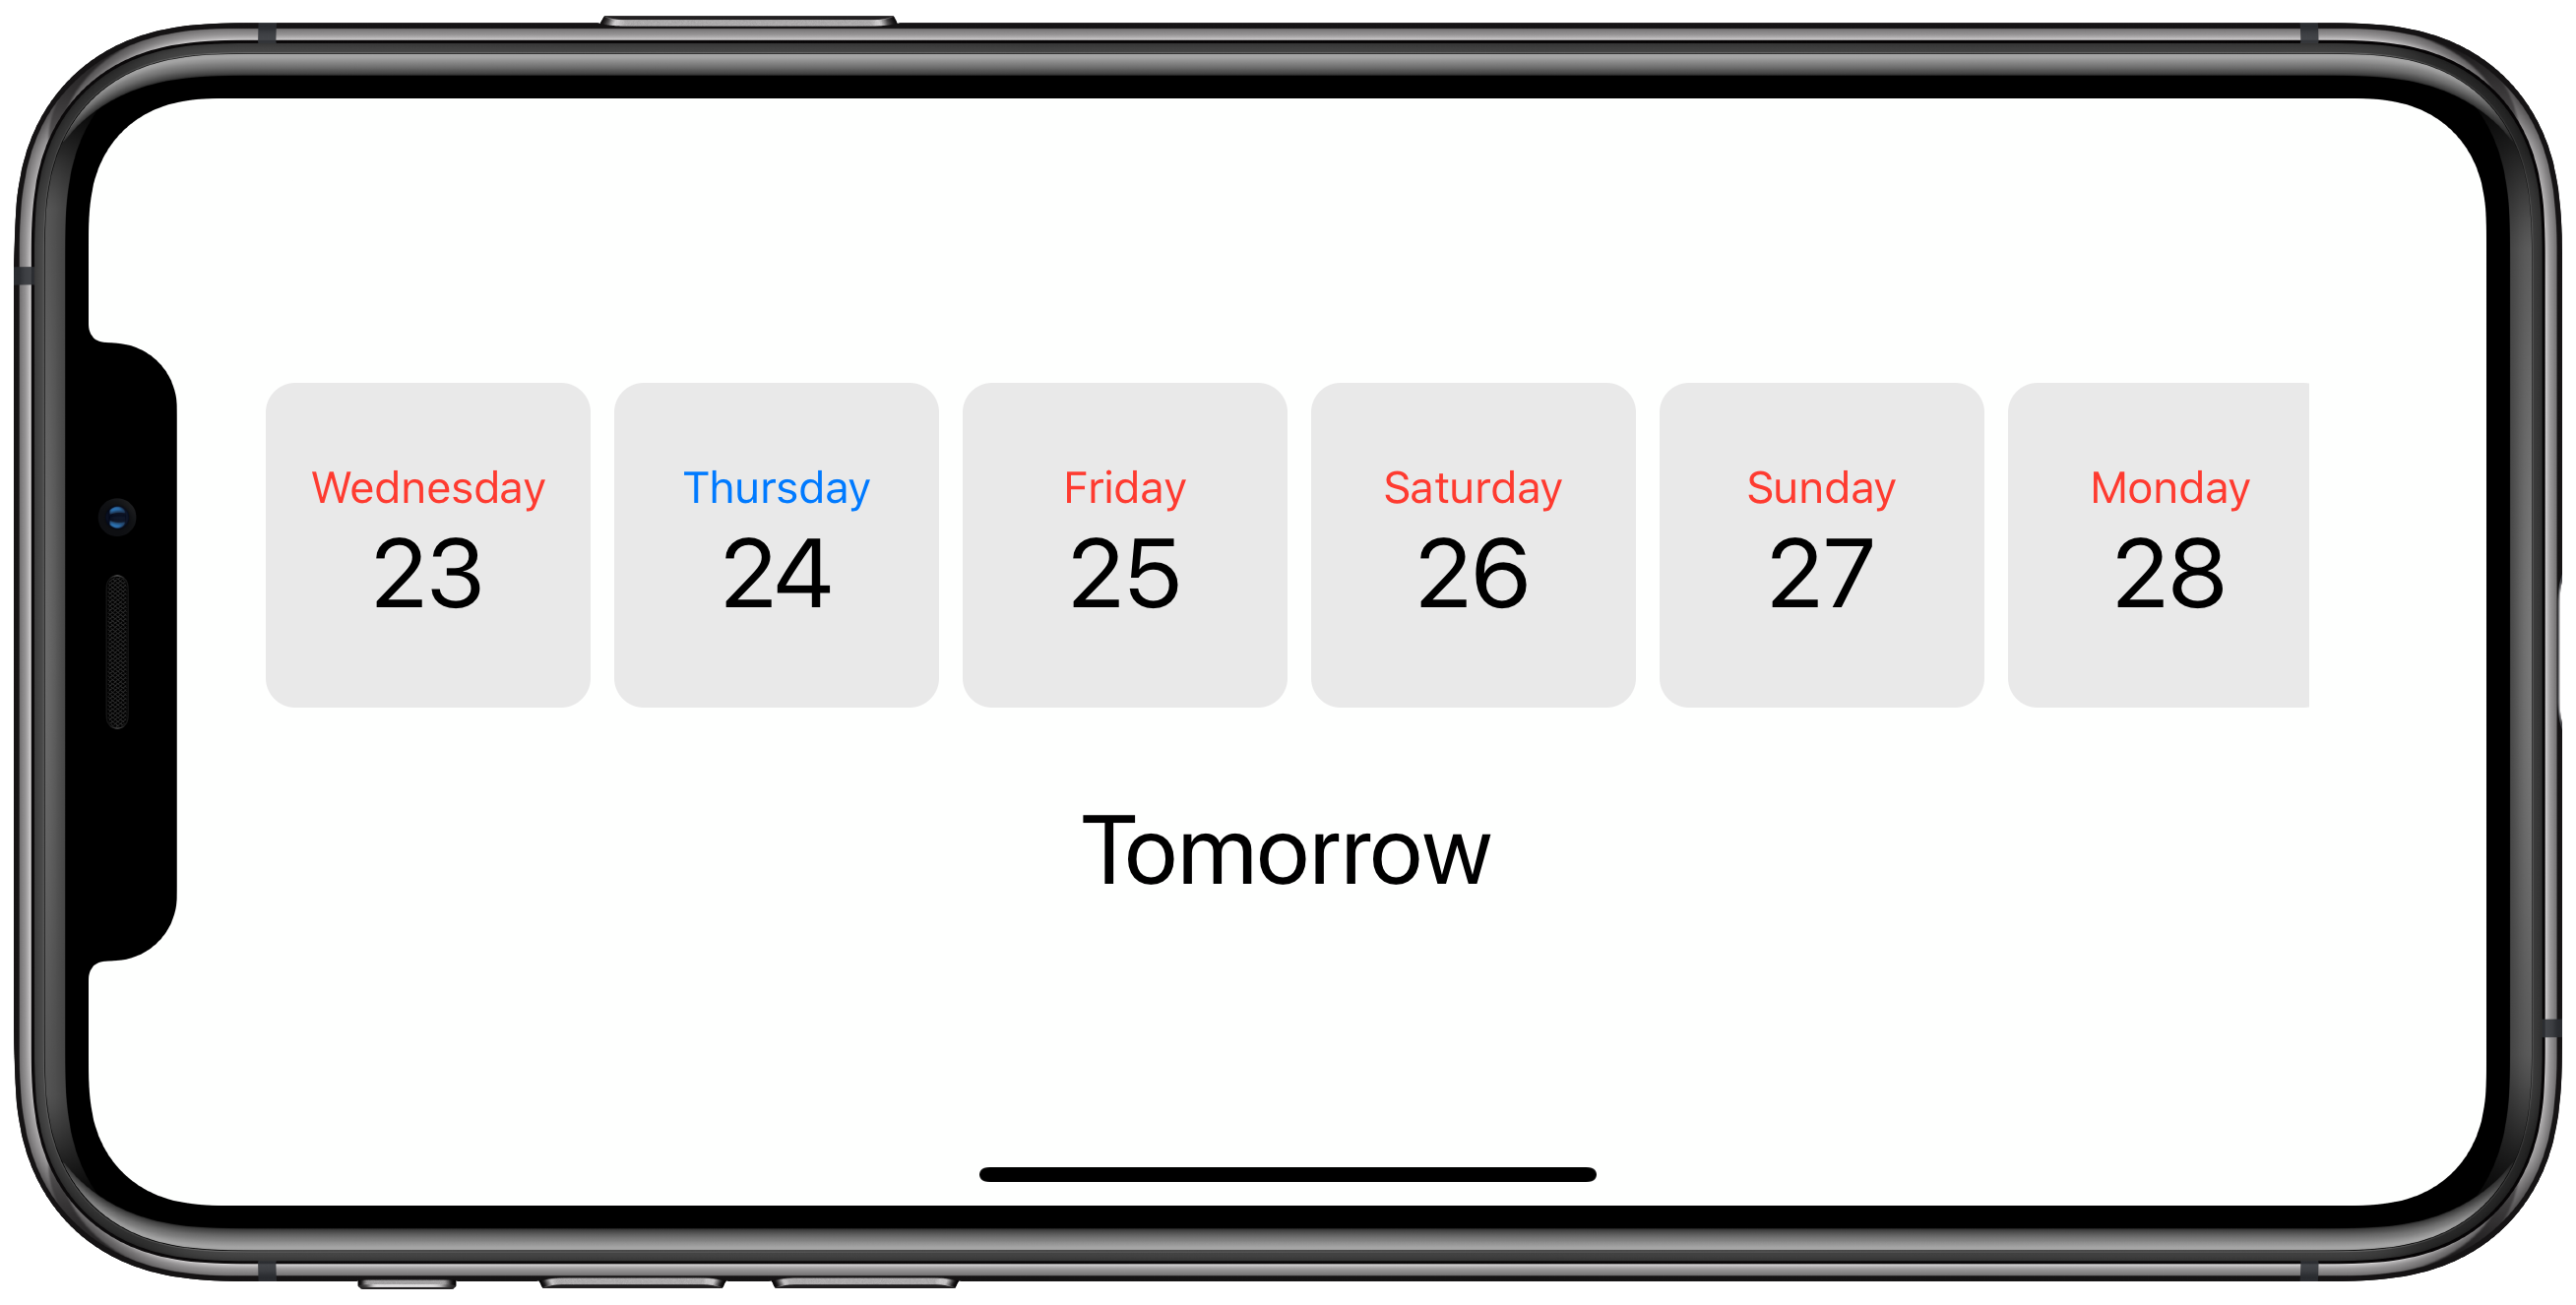
This is what we’re after:
Ideally, our ContentView would be responsible for holding the value of the currently selected date, and the child views would be given access to read and write this date in order to update the view.
This is exactly what the @State and @Binding property wrappers give us. Let’s work through the steps.
Firstly, we need to add a State property to our ContentView to store the currently selected date:
struct ContentView: View {
    @State private var selectedDate: Date
}
Then add Binding properties to our child views:
struct DayView: View {
    @Binding var selectedDate: Date
}

struct SelectedDayView: View {
    @Binding var selectedDate: Date
}
Then of course, we must pass the currently selected date into
the child views. To do this, we apply the $ prefix to our
selectedDate property, which returns a Binding:
DayView(date: date, selectedDate: self.$selectedDate)
SelectedDayView(selectedDate: $selectedDate)
This change tells our child views that they must be re-rendered when the state of this property changes. It also allows the views to update the state (and as you’ll see below, that’s exactly what we do in onTapGesture).
Here’s the full code:
import SwiftUI

let lightGrey = Color(#colorLiteral(red: 0.9160255393, green: 0.9160255393, blue: 0.9160255393, alpha: 1))

let dates: [Date] = {
    (0...10).map { offset in
        Calendar.current.date(byAdding: .day, value: offset, to: Date()) ?? Date()
    }
}()

func formatDate(_ date: Date, format: String) -> String {
    let dateFormatterGet = DateFormatter()
    dateFormatterGet.dateFormat = format

    return dateFormatterGet.string(from: date)
}

struct ContentView: View {
    @State private var selectedDate: Date

    var body: some View {
        VStack {
            ScrollView(.horizontal, showsIndicators: false) {
                HStack {
                    ForEach(dates, id: \.self) { date in
                        DayView(date: date, selectedDate: self.$selectedDate)
                    }
                }
            }
            .padding()
            SelectedDayView(selectedDate: $selectedDate)
        }
    }
}

struct DayView: View {
    var date: Date
    let size: CGFloat = 110

    @Binding var selectedDate: Date

    var isSelected: Bool { selectedDate == date }

    var body: some View {
        VStack {
            Text(dayName).font(.system(.callout)).foregroundColor(isSelected ? Color.blue : Color.red)
            Text(dayNumber).font(.system(.largeTitle))
        }
        .frame(width: size, height: size)
        .background(lightGrey)
        .cornerRadius(10)
        .onTapGesture { self.selectedDate = self.date }
    }

    var dayName: String { return formatDate(date, format: "EEEE") }
    var dayNumber: String { return formatDate(date, format: "d") }
}

struct SelectedDayView: View {
    @Binding var selectedDate: Date

    var body: some View {
        Text(dayName).font(.system(.largeTitle))
    }

    var dayName: String {
        if Calendar.current.isDateInToday(selectedDate) {
            return "Today"
        } else if Calendar.current.isDateInTomorrow(selectedDate) {
            return "Tomorrow"
        } else {
            return formatDate(selectedDate, format: "EEEE")
        }
    }
}

struct ContentView_Previews: PreviewProvider {
    static var previews: some View {
        ContentView(selectedDate: dates.first!)
    }
}
Note that our ContentView now requires the property selectedDate to be defined, so we must make sure this value is set inside our ContentView_Previews and SceneDelegate.
Binding and State properties are crucial parts of even the simplest of apps, and you’ll quickly find yourself wanting more as the complexity and feature set of your app grows. This is where you’ll want to turn to the Combine framework and ObservableObjects.
I’ll talk more about that in another post.